
My wife and I set up a little rinky dink minecraft server on one of my Toshiba laptops. Unfortunately it’s starting to suffer from reliability issues. Instead of building a computer/server from scratch I decided to pay (or not) for the convenience of an AWS server. This should be cheaper than the upfront cost of a new computer + electricity + my time and effort setting up and maintaining it. Of course owning a server will be cheaper in the long run, but I simply do not want one in my house.
These servers have an hourly rate of $0-$0.22/hr. This project will outline my steps towards creating the minecraft server and implementing a method to save money when it’s not in use.
Requirements
- Must host a minecraft server
- Up to 7 players
- Must shut down when not in use
- Minimal effort in starting it back up
- Needs to be accessible by all friends
- Easily re-accessible
Plan to execute
- Establish an EC2 Instance
- Transfer over minecraft files
- Write Duckdns cronjob to update the IP address on startup
- Write minecraft server auto-start script
- Write a script that checks active connections on port 25565 (minecraft) and 22 (ssh) and shuts down the server if it’s not being talked to for over an hour
- Set up a webpage that lets users log in and turn on the server remotely
1) EC2 Instance
Starting an instance easily done by creating an amazon AWS account and following the tutorial below.
There is enough info here to get this thing running but we’ll have to deviate from the path to get it running on it’s own. The cool thing here is you can start in the free tier and if you’d like to upgrade the hardware, all you have to do is change the instance type.
2) The Transfer
Since I had a minecraft server already working, I figured I’d just delete the install on the AWS server and copy mine over. This was particularly difficult as I’m currently in Alaska and my computer is in New Mexico. It doesn’t like to stay alive longer than 20 or 30 minutes. What I did was zip up the entire minecraft server folder and transfer it as one chunk. Previous transfers failed mid-way through and I think a few files got corrupted. I got it transferred over thanks to the help of Jake and Melissa who kept rebooting my laptop!
Note for me for future scp transfers:
scp [email protected]:/opt/zippedserver.zip /opt/destination_folder3) DuckDNS Cronjob
This makes connecting easier as each time the server turns on, it gets a new ip address and having a name to connect to is a lot easier than copy-pasting the new ip address every time you start up the server.
I use DuckDNS because it’s free and has been working for me. Use whatever flavor you’d like for your dynamic DNS reroutes.
Here is the tutorial for “installing” DuckDNS as a linux cronjob.
4) Minecraft Auto Start
I had one of my nerd friends (Jake) get this working on my original rig. So this will be a challenge for me.
This tutorial seems to work just fine but I had to make a couple edits and I’ll clarify some of the code in it.
4.1) Writing a service
navigate to /etc/systemd/system/ and create a new file using your favorite text editor
sudo nano /etc/systemd/system/[email protected] I use nano, bite me. Also, insert the following text into the file:
Note and then omit the comments in parentheses.
[Unit]
Description=Minecraft Server: %i
After=network.target

[Service]
WorkingDirectory=/opt/minecraft/%i

(THIS WORKING DIRECTORY IS IMPORTANT, PUT IT 1 FOLDER BACK FROM YOUR server.jar FOLDER)

User=minecraft (MAKE SURE YOU HAVE SET UP A USER WITH APPROPRIATE PRIVILEGES)
Group=minecraft (MINE IS DIFFERENT. DELETE COMMENTS IN PARENTHESES)

Restart=always

ExecStart=/usr/bin/screen -DmS mc-%i /usr/bin/java -Xmx2G -jar minecraft_server.jar nogui

ExecStop=/usr/bin/screen -p 0 -S mc-%i -X eval 'stuff "say SERVER SHUTTING DOWN IN 5 SECONDS. SAVING ALL MAPS..."\015'
ExecStop=/bin/sleep 5
ExecStop=/usr/bin/screen -p 0 -S mc-%i -X eval 'stuff "save-all"\015'
ExecStop=/usr/bin/screen -p 0 -S mc-%i -X eval 'stuff "stop"\015'


[Install]
WantedBy=multi-user.target
Start the service with this command.
sudo systemctl start minecraft@SERVERFOLDERI then use the top command to ensure Java is running. Next you need to enable the service so it runs on boot.
sudo systemctl enable minecraft@SERVERFOLDERThis should work, but be sure to check the status as follows.
sudo systemctl status minecraft@SERVERFOLDERIf it looks good, go ahead and shut down the machine (this stops the instance on the EC2 control panel). When the instance is fully stopped, start it back up from the control panel and refresh your server list in minecraft. It takes a minute or two as I don’t think the dns changes propagate right away.
At this point, you have a fully functional minecraft server! If you have the urge to spend $2000/year on hosting, you’re all done! Pat yourself on the back. If you’re ready for a challenge continue on!
5) Auto Shutdown
This is really easy (in concept) as we don’t have to figure out how to talk to AWS, we can just write a script on the machine to turn itself off. I’m personally not worried about 25 cents, so the script will turn on only once an hour and check port 25565 and 22 for active connections.
First, let’s make a bash script called check4users.sh and put it in it’s own folder inside of your minecraft directory.
mkdir scripts
cd scripts
sudo nano check4users.sh
Throw a shebang on the first line of the file
#!/bin/bashClose, and save the script. I know! We haven’t written anything yet! Let’s chmod this first so it can run!
sudo chmod +x check4users.shOkay now, let’s return to the script! Paste this code into check4users.sh
#!/bin/bash
#Checks for active connections on  port 22 (ssh) and 25565 (minecraft)
#If no connections are found, the script gracefully shuts down the
#Minecraft server (saving progress) and then shuts down the Service
#This will stop the EC2 instance and save money.

sshCons=$(netstat -anp | grep :22 | grep ESTABLISHED | wc -l)
mcCons=$(netstat -anp | grep :25565 | grep ESTABLISHED | wc -l)
echo "Active SSH Connections: $sshCons"
echo "Active Minecraft Connections: $mcCons"

if [ $((mcCons)) = 0 ]
then
        echo "We normally shutdown here, but let's check for SSH connections"
        if [[ $((sshCons)) = 0 ]]
        then
                echo "no ssh connections, shutting down server"
                sudo systemctl stop minecraft@christian
                sudo shutdown
        else
                echo "There are 1 or more active ssh connections, skip termination"
        fi
else
        echo "Somebody is playing minecraft, do nothing!"
fi
Next (again as root) add this script to your crontab.
crontab -eIt’s vim (ick) so press i to insert text and paste the following text.
0 */1 * * * /opt/minecraft/SCRIPTDIRECTORY/check4users.shPress esc to stop your text insertion. Then “:wq!” it’ll save and update your cronjobs.
This will run the check at the top of every hour. If you need to change this time, make it no less than every 10 minutes. I set it to every 5 and had some trouble catching the server before it shut itself off (remember, the server takes time to boot, and duckdns takes time to update).
One flaw in this script is that if you turn on the instance at, say, 7:58pm. The server could boot, run the chronjob at 8pm, see nobody connected, and shut itself down. I’ve only experienced this problem once so far, but I just don’t want to go down the rabbit hole of re-writing this.
6) Starting the server back up
Now that we have the server running minecraft on startup and then shutting down when nobody is playing it we need a way to start it remotely. I can do this by logging into amazon aws and clicking start instance.
However, I don’t want to answer every text message of “I want to play minecraft”. I also don’t want to share my amazon aws login information. So, let’s create a website that a person can log in to and start the server from there.
Requirements:
- A website (I think www.farnsworth.engineering/minecraft will do!)
- SQL Database
- Stores user information
- Stores some usage data from the AWS instance
- PHP Experience
- Sends a request through the AWS SDK to start, stop, and restart the server
- Handles login and account creation.
- XAMPP + Brackets
- This let’s you test out this code outside of production.
Rant: Long story short, I got this part working a long time ago. However, my hosting provider Arvixe has been dragging their feet for two weeks to solve a simple clock problem. It was literally faster for me to pack up everything and migrate it over to Amazon Lightsail than it was for Arvixe to update the system clock. End of Rant. Unfortunately my old blog got nuked…so here’s my first post.
Let’s get started!
6.1) Establishing a Database
Let’s make a database! In plesk it looks a lot like this:
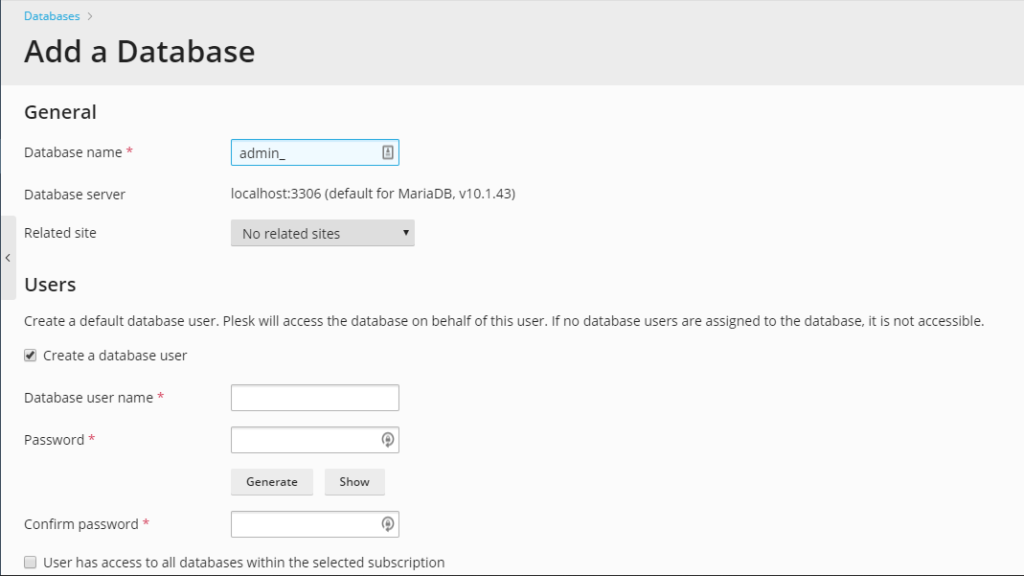
Go ahead and name the database minecraft, related site: example.com, username: minecraft, generate the password (and copy it down). These will be your credentials for accessing the database later on. If you’re going to prototype this code with XAMPP you can use phpmyadmin to make the database. Do yourself a favor and don’t test your code in production.
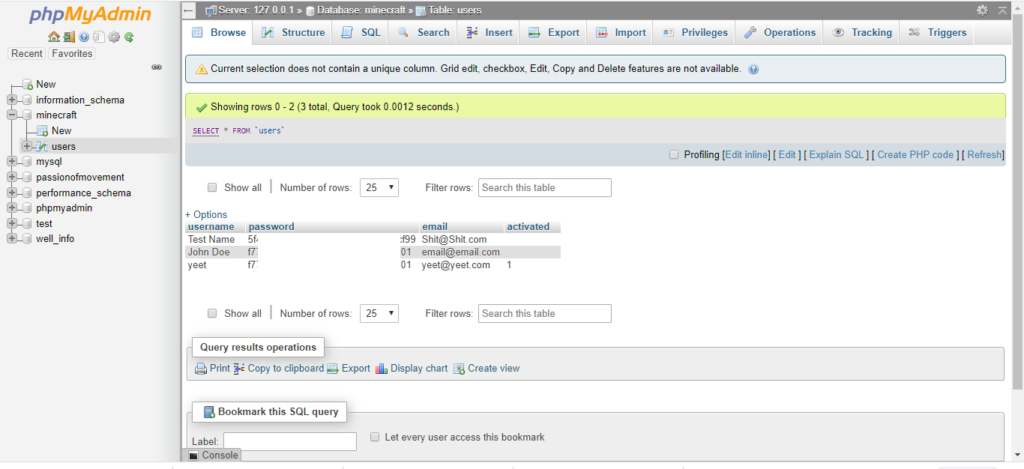
Okay, now we need to create a table in phpmyadmin (webserver or local machine) called users. It’ll have 4 columns. “username, password, email, activated”.
6.2) PHP
This part has been bootstrapped off of a few other projects, but works fine. Download this zip file (minecraft_server.zip). Fair warning: the HTML is garbage. But this provides the PHP necessary to talk to AWS.
Speaking of talking to AWS, download the SDK here (don’t worry it’s from AWS).
Unzip both minecraft_server.zip and aws.zip into your webserver/local server.
Things you need to provide in server.php:
- Remember to edit the credentials you copied from your database into line 5.
- Line 15 of server.php should point to the location of the SDK file. It’s a little tricky to figure out at first, but if you turn on debugging, the error message should give you the basic directory structure of your hosting server.
- Line 25 and 26 need to be security credentials you generated from your user account.
- Line 30 is your particular EC2 Instance ID.
Extras:
- Remember the column you made in your database named “activated”? You’ll need to manually set it to value 1 from phpmyadmin. This keeps random yeahoos from making an account and starting your server. If you’re interested in a challenge you can have your server email you every time an account is created and you can click a link to approve/disapprove the account. I figured with just 7 players it wasn’t much of a hassle.
2. Server.php has the functions “stop” and “restart” in it. I omitted them as buttons from index.php to keep people from stopping the server while you’re playing. If you need to restart. You can log into your control panel yourself and do it. However, if you trust your players, you can add it in or put another column in your database as “administrator” or something like that and just give yourself permission. Worst case scenario, your players can log off and the server will shut down at the top of the hour.
From here you should have a working website that lets you create an account, log in, and turn on your AWS minecraft server!

Congrats!
Now write your own CSS and spiffy up the website!
UPDATE!
I’ve since Spiffied up the website with CSS (I bought a theme a while ago for another project) and recycled it into this.
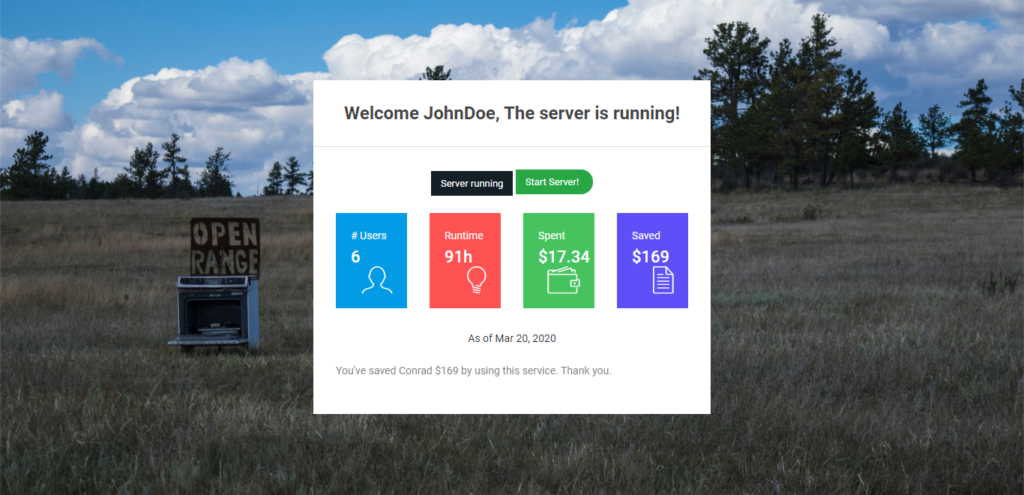
The # of users is of course the number of rows I have in my users database. Easiest variable I’m importing here.
Runtime is calculated by incrementing a variable by 1 every time the check4users.sh script is ran. The result is sent via a post request to my webserver and that number overwrites the most current value of runtime in my database. This is a little janky I know. But it allows for asynchronous updating of the table without calling the Cost Explorer Service every hour.
Spent dollars is calculated using the AWS cost explorer sdk (included in the AWS folder). THIS CAN GET PRICEY. BE CAREFUL. The cost explorer charges your account $0.01 for every request. I have a separate php file that runs via crontab on the webserver once a month and updates a new table in my minecraft database. This keeps my users from charging me a penny every time they log in, to update a variable I already should know.
Saved dollars is simply the cost to run my instance every hour multiplied by the number of hours between when I started using this service and today’s date.
Thus far, I’ve saved $169 by using this service, and spent only $17!
$17 is actually an all encompassing amount as that includes costs for EC2+Lightsail+CostExplorer.